


Before you publish
Before following the banner or opening Publish, use Preview to test the main user journey, check the layout at the screen sizes you support, and fix any errors reported by Agent. Publishing makes the current version available to other people, so avoid including secrets or private test data in the app.Publish your app
1
Open the Publish dialog
Select Publish your app in the development-preview banner to return to the publishing flow. You can also open the project yourself and select Publish in the upper-right corner of the Project Editor while working in Build or Design.
2
Choose the domain and access settings
A domain is the address visitors use to reach your deployment. Review the generated 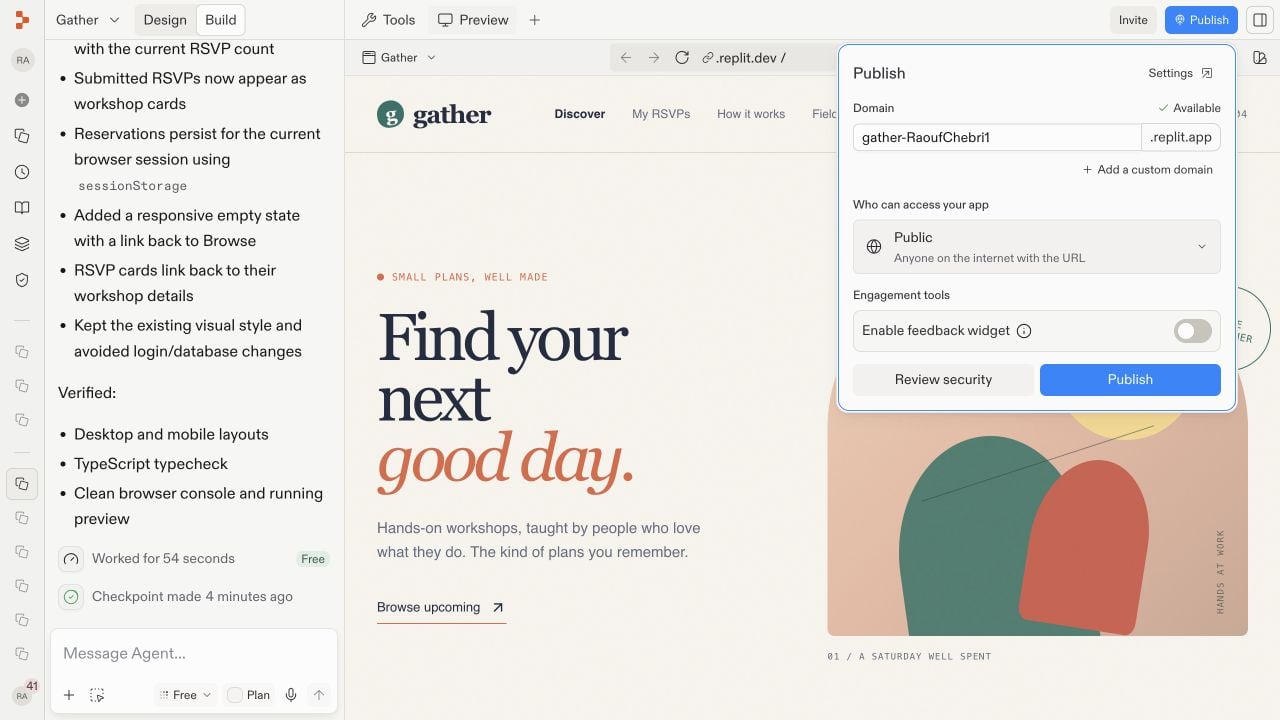
.replit.app domain and change its available name if needed. Then choose an access level, which determines who is allowed to open the app:- Public makes the app available to anyone with the link.
- Password protected requires visitors to enter a shared password.
- Workspace only limits access to members of your workspace.
- Invite only limits access to the people or groups you select.
3
Review security and publish
Select Review security to check the release before it goes live. When the domain, access, and security settings are ready, select Publish.Replit provisions the deployment, runs security checks, builds and bundles the app, and promotes the release. Provisioning prepares its cloud resources; building and bundling turn the project into a production-ready package; promoting makes that package the live version. Keep the project open while the stages complete.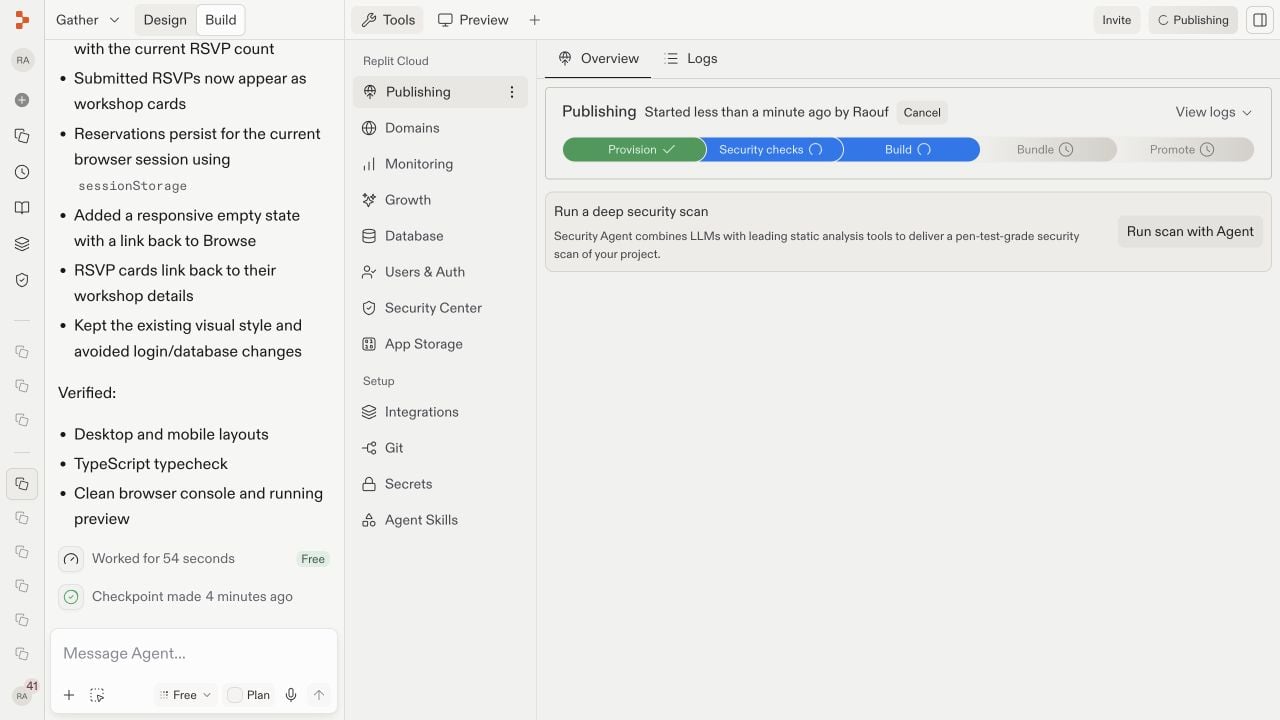
4
Open and verify the live app
When publishing finishes, Replit shows the deployment status and public URL. Open the URL and test the live app — not only the development preview — to confirm that its pages and most important actions work as expected.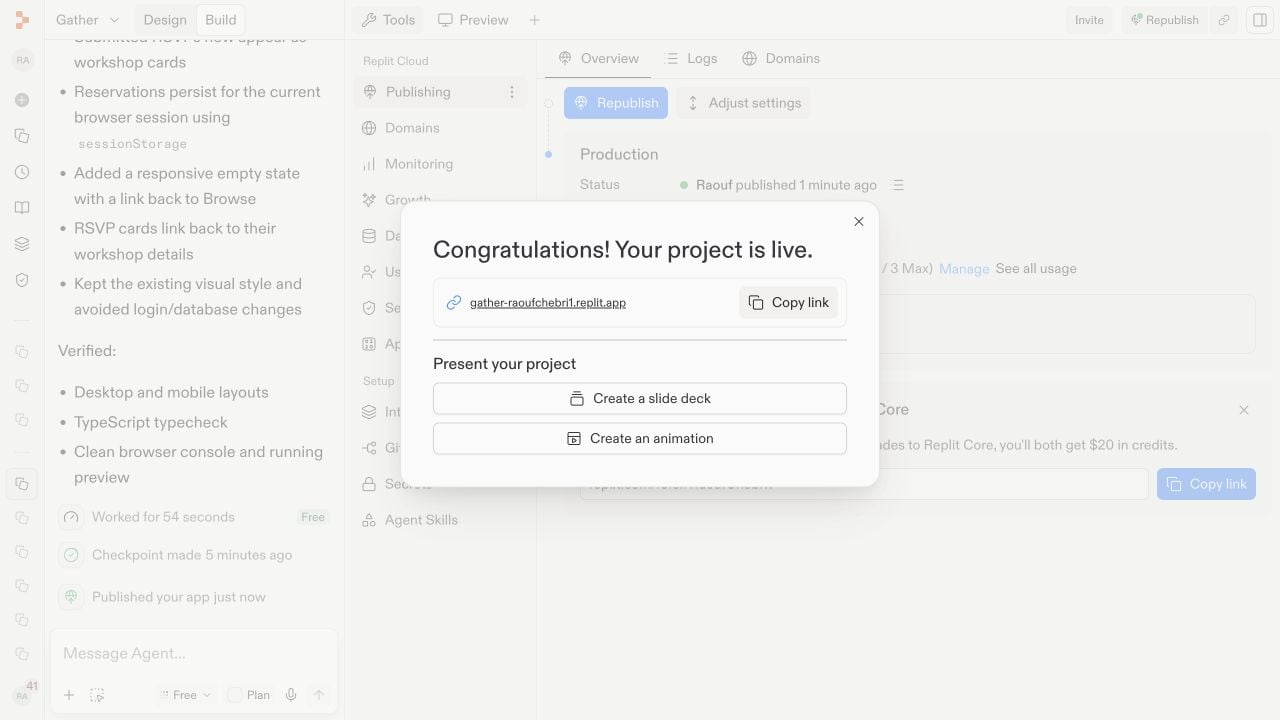

Understand the published project
After publishing, the project has two related parts: the editable project where you continue building and the production deployment currently serving visitors. Open Tools to inspect and manage that production environment. The Publishing pane is the deployment overview. It shows whether the latest release succeeded, who can access it, where it runs, how it is hosted, which resources it can use, and which domains point to it. The deployment type describes how Replit runs the app. Autoscale starts more machines as traffic changes. Reserved VM keeps a machine continuously available. Static serves files that need no running backend, while Scheduled runs a program on a timetable. See Deployment types to compare them. Machine power is the CPU and memory available to each instance. The maximum machine count limits how far Autoscale can expand. See Machine configuration. More resources can improve capacity and increase usage costs. Deployment geography controls the region where the app runs. A region closer to most visitors can reduce latency. See Project geography. Depending on your app and plan, Adjust settings or Manage exposes these controls along with production secrets and related deployment options. These are optional production controls. You do not need to change them to share a typical app, and some changes can affect availability or usage costs.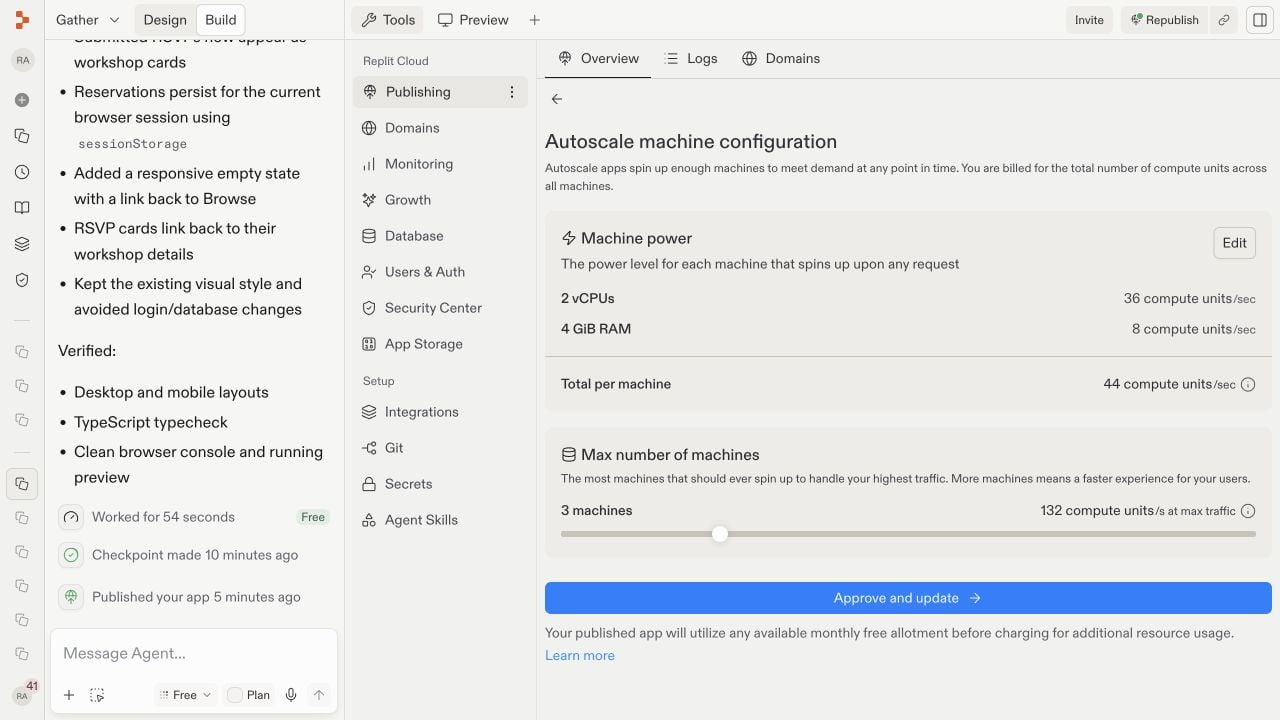
Monitor the release
Monitoring answers a production question: Is the app healthy and responding well? Open Monitoring under Replit Cloud in the Tools pane. It shows requests, HTTP statuses, response durations, CPU utilization, and memory utilization. Status codes reveal failed requests, while durations reveal slow responses. CPU and memory charts help identify resource limits. New releases may show little data until the live app receives traffic. For the full tour, see Monitoring your app.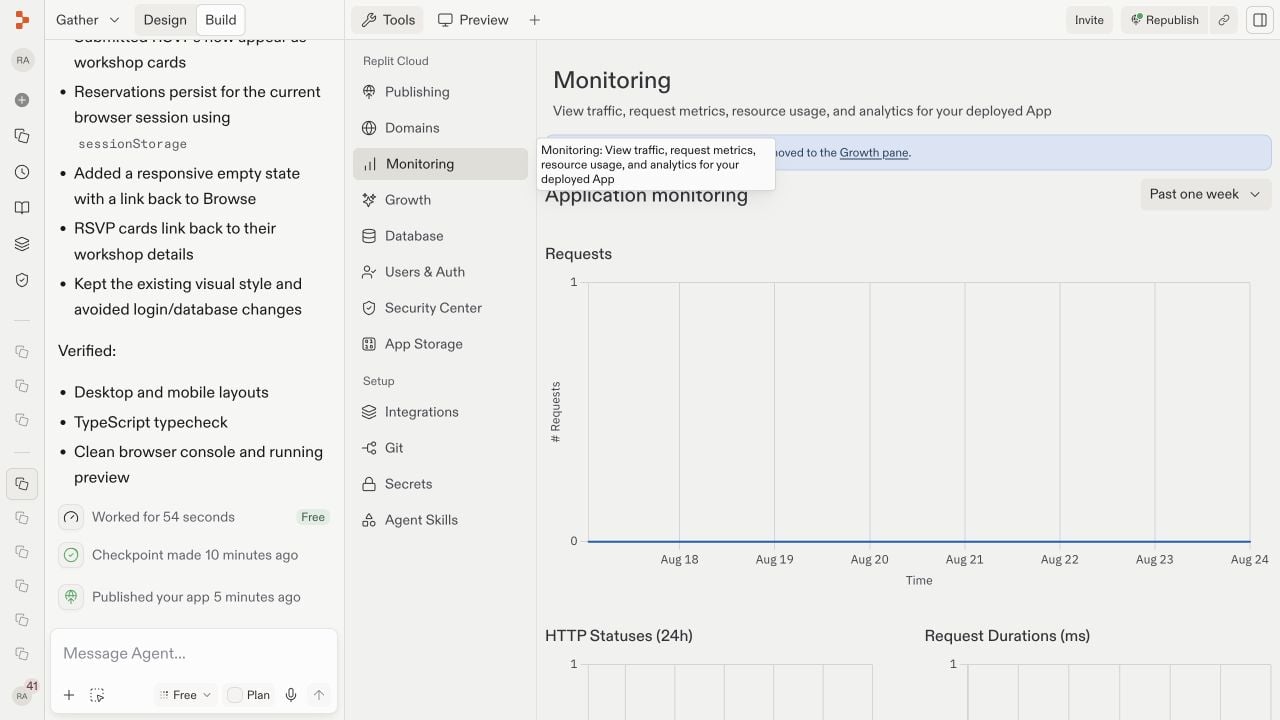
Review traffic and growth
Growth answers a different question: Are people finding and using the app? Open Growth under Replit Cloud in the Tools pane. Basic metrics include visitors, top pages, referrers, countries, browsers, and devices. These show where an audience comes from and what attracts attention. The SEO rating measures how well published pages are prepared for search engines. Builders on a paid plan can use SEO Agent to scan for improvements. Analytics populate after the published app receives traffic.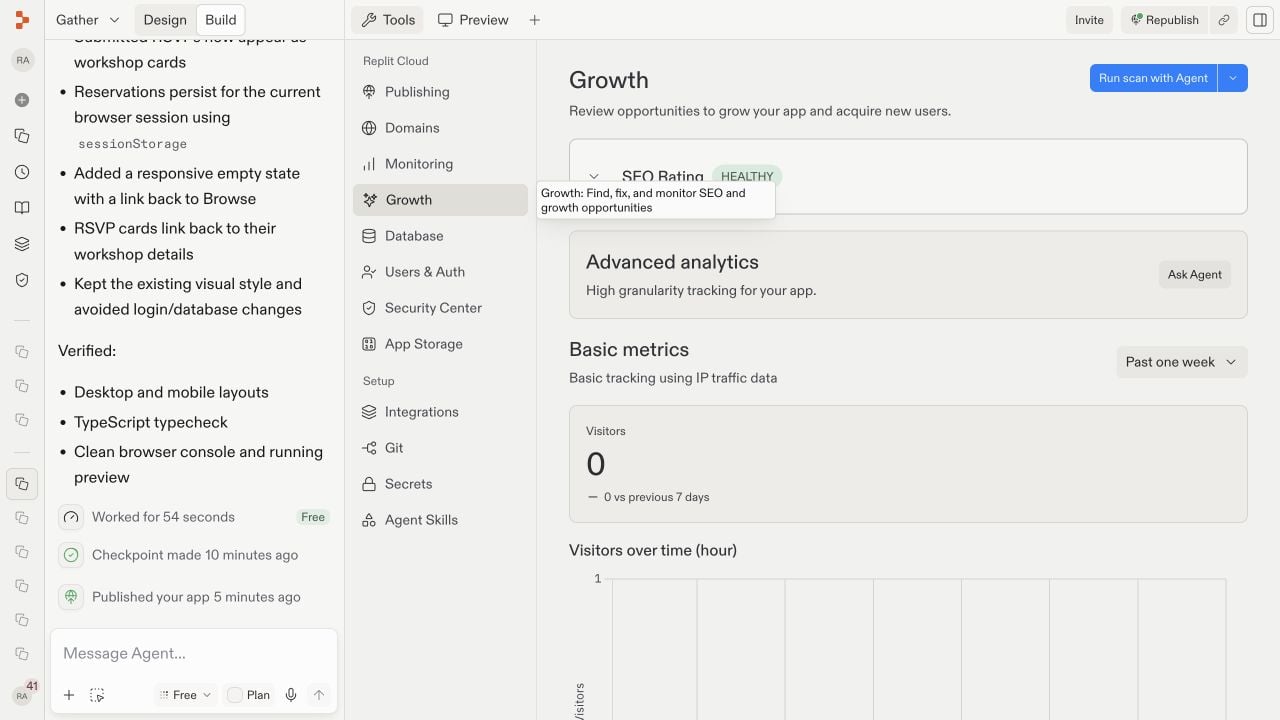
Update your published app
Changes in the Project Editor do not automatically replace the live release. This separation lets you prepare and test a change without disrupting visitors. Test your changes in Preview, then select Republish when you are ready. Republishing creates a new production release at the same URL, so you do not need to send visitors a new link. After republishing, open the public URL again and verify the changed behavior. If a release fails, use the publishing status and logs to identify the failing stage before trying again.Next steps
Add a custom domain
Use your own domain instead of .replit.app.
Continue →
Deployment types
Compare Autoscale, Reserved VM, Static, and Scheduled deployments.
Compare deployments →
Troubleshoot publishing
Find common publishing problems and how to fix them.
Troubleshoot →