What is Replit Agent?
Agent is your creative partner. Agent takes your ideas, helps you refine them, and then makes them real. Unlike a chatbot that only answers questions, Agent takes action: it sets up your project, creates applications, checks its work, and fixes problems along the way. Describe what you want in everyday language. No code or technical knowledge required. Agent handles the rest, from planning to deployment.How to use Replit Agent
Getting started
Describe what you want
In your Replit Workspace, just start chatting. Describe an app you want to build, ask a question, research a topic, or pull data from connected services like BigQuery, Slack, or Notion. There are no constraints. Replit Agent handles whatever you throw at it.
Choose what to build
Optionally, select a project type: web app, mobile app, slides, design, data visualization, and more. If you already described what you want in step 1, Agent figures out the right setup automatically.
Agent builds it
Agent writes code, sets up infrastructure, and tests the result. Once you’re in your project, you can switch between Agent modes to control how it builds.
You’re not locked into one type. Start with a web app and add a mobile app, slides, or a video later — all in the same project.
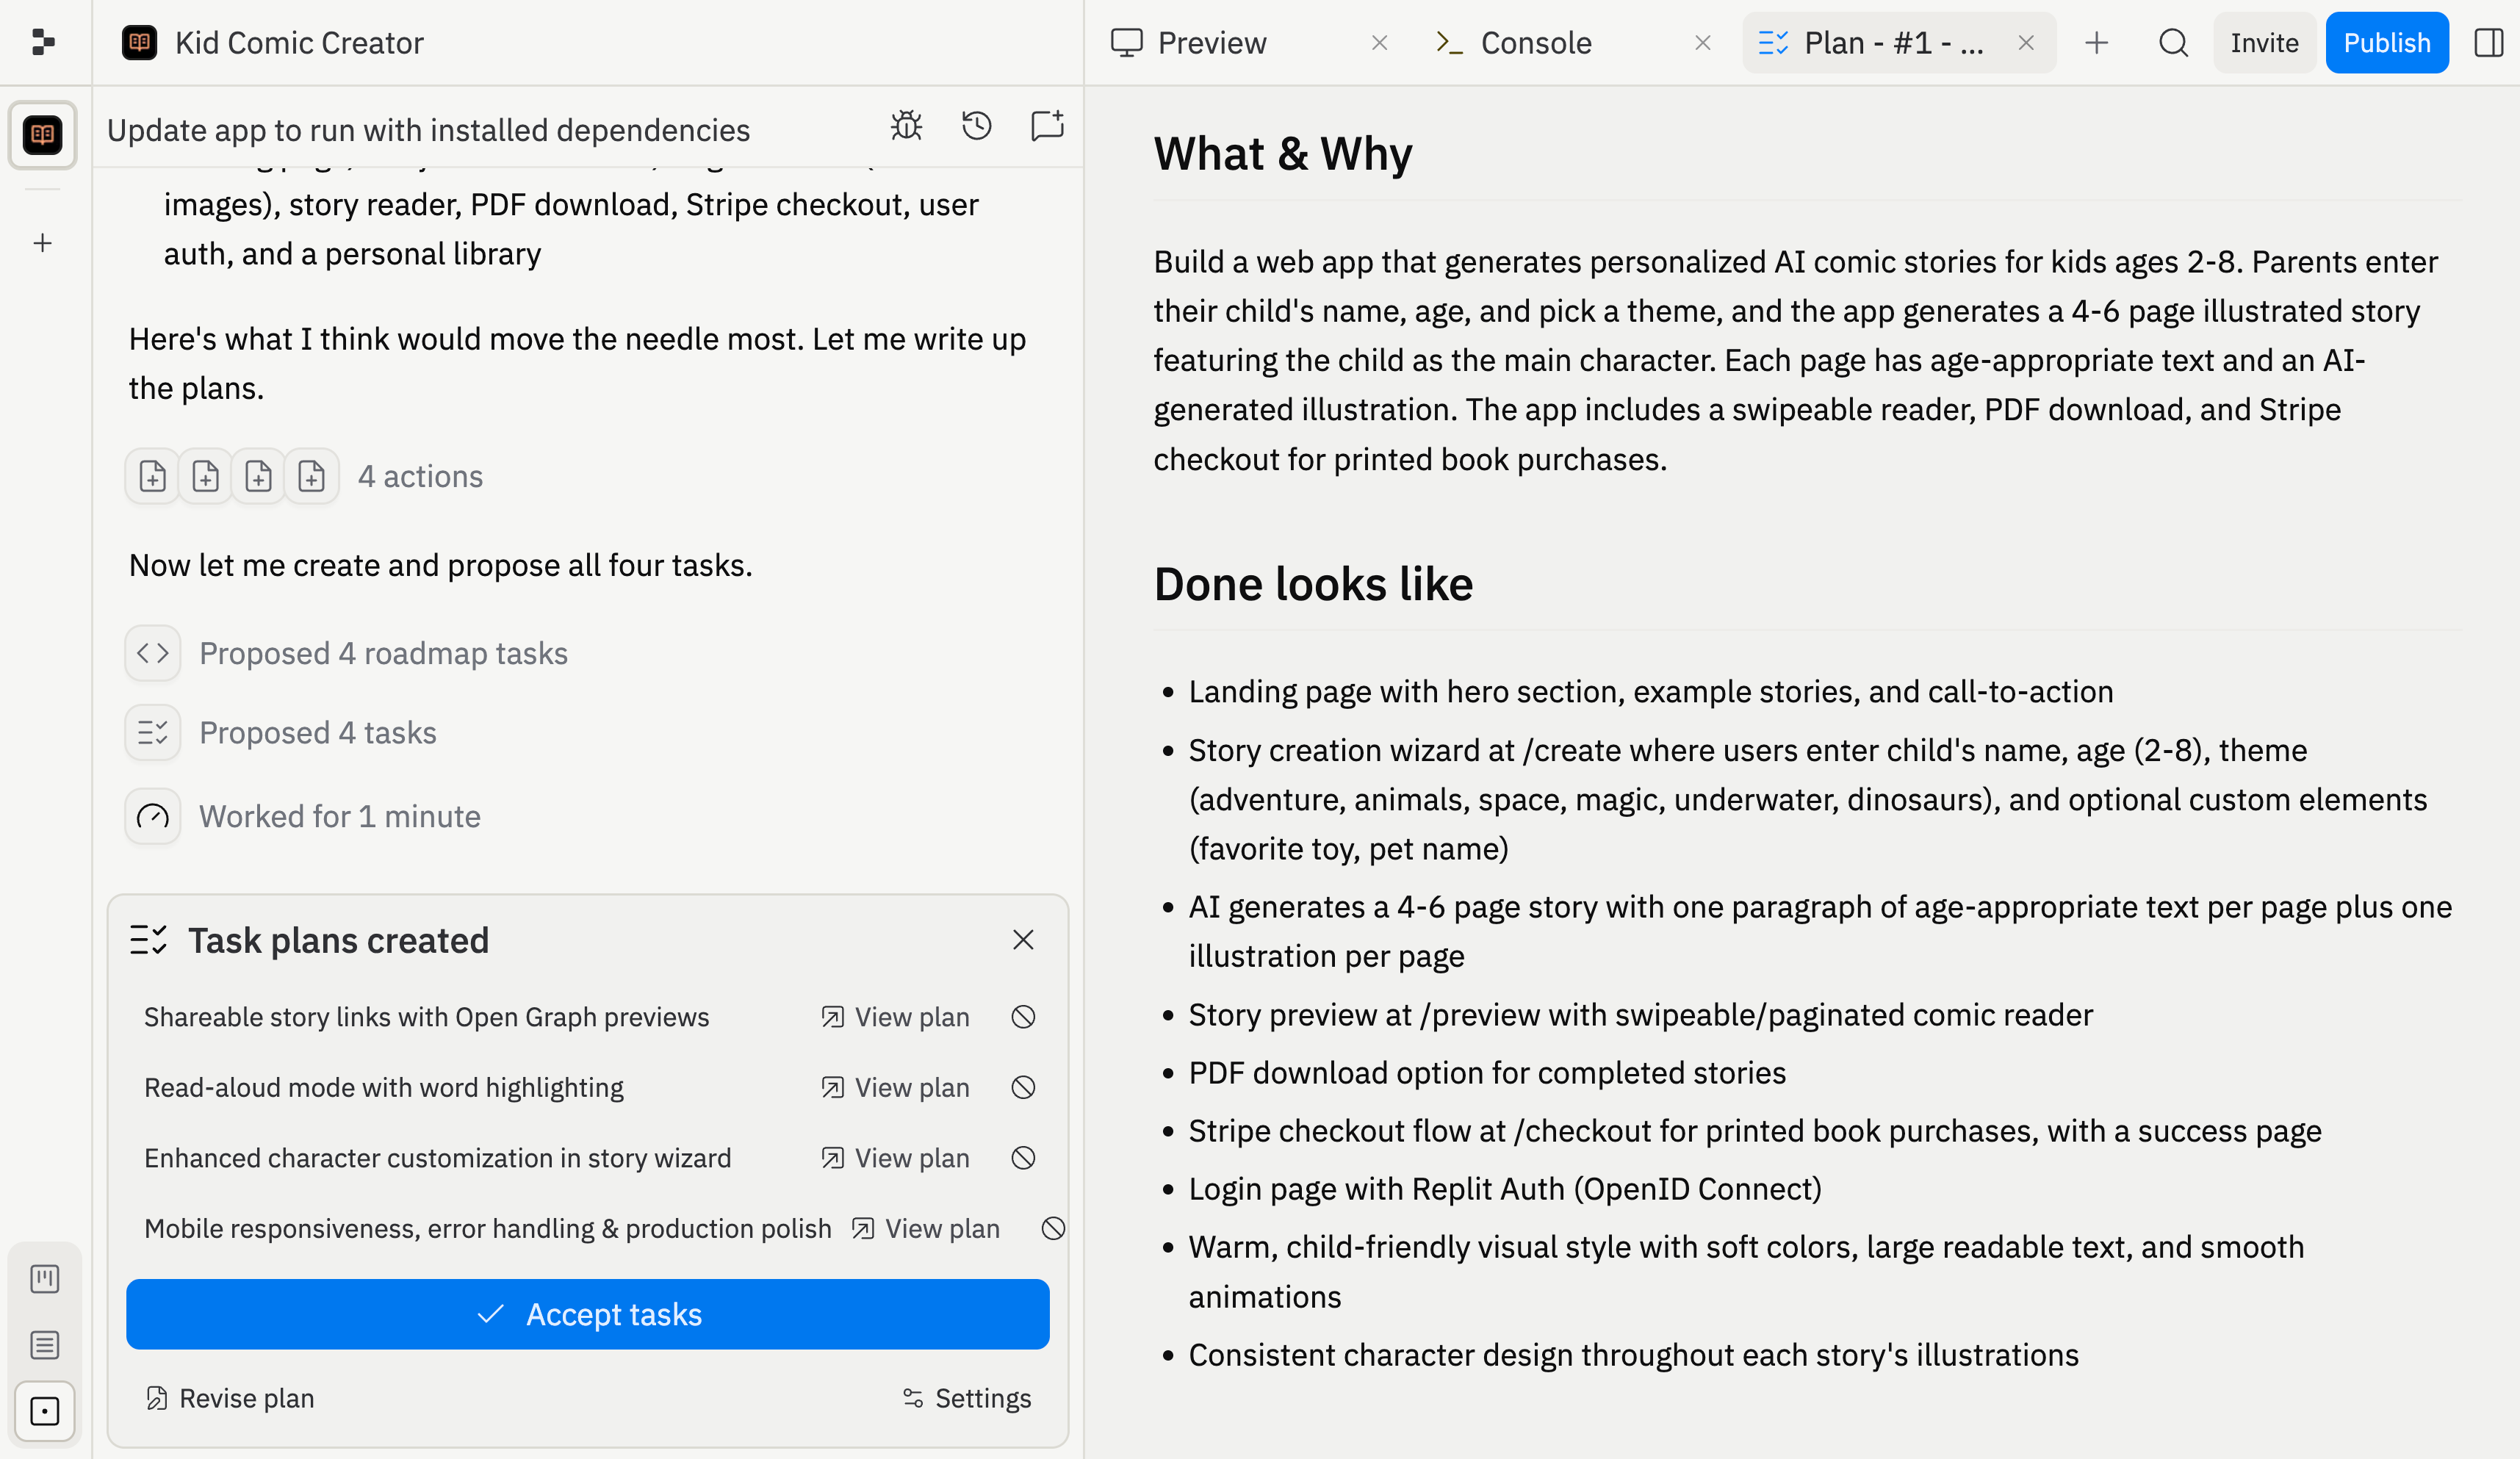
Plan mode
Enable Plan mode to brainstorm, ask questions, and map out your project before Agent changes any code or data. In Plan mode, Agent will:- Break down complex projects into ordered task lists
- Explore different approaches and weigh trade-offs
- Review and refine before any code is written
Agent modes
Choose how Agent builds your project:- Lite: Make lightweight, inexpensive changes quickly. Lite mode is ideal for visual tweaks, bug fixes, and scoped features.
- Economy: Use Agent’s cost-optimized models for everyday tasks. Expand Advanced settings to manage features like App Testing and Code Optimizations.
- Power: Use Agent’s most capable models for harder problems, larger changes, and longer builds. In Advanced settings, you can also turn on Turbo for up to 2.5x faster builds at higher cost (Pro only).
Tip: You can also enable Plan mode to review and iterate on Agent’s plan before building begins. Max mode is no longer available; use Power for the most capable standard builds.
What you can build with the Replit Agent
- Web apps, mobile apps, data dashboards, and AI-powered tools
- Visual designs and prototypes — explore mockups on the Design Canvas before committing to code
- Multiple outputs in one project — web apps, mobile apps, slides, and videos sharing the same backend
- Files and documents — CSVs, PDFs, PowerPoint files, Markdown docs
- Connected service queries — pull data from BigQuery, Linear, Slack, Notion, and more directly from chat
Start building now
Describe your idea and let Agent bring it to life — no setup required.
Frequently asked questions
Do I need to know how to code?
Do I need to know how to code?
No. Agent handles all the technical work — writing code, setting up infrastructure, configuring databases. You describe what you want in plain language and Agent builds it.
What's the difference between Lite, Economy, and Power?
What's the difference between Lite, Economy, and Power?
Lite is for quick, targeted changes (10-60 seconds) such as visual tweaks, bug fixes, and scoped features. Economy is the best default for most builds when you want to balance cost and quality. Power uses the most capable models for harder tasks, and Turbo is an optional Power-only toggle in Advanced settings when you need the fastest runs.
Can I build more than one thing in a project?
Can I build more than one thing in a project?
Yes. You can add web apps, mobile apps, slides, videos, and data visualizations to the same project — all sharing the same backend and data.
What happens if Agent makes a mistake?
What happens if Agent makes a mistake?
Agent tests its own work on a regular basis. Agent also creates checkpoints as it works, so you can roll back to any previous state. You can also chat with Agent to describe what went wrong and it will fix the issue.
Availability
| Capability | Core | Pro |
|---|---|---|
| Agent chat and building | ✅ | ✅ |
| Lite mode | ✅ | ✅ |
| Economy mode | ✅ | ✅ |
| Power mode | ✅ | ✅ |
| Design Canvas | ✅ | ✅ |
| Multi-Artifacts | ✅ | ✅ |
| Active background tasks | 1 | 10 |
| Turbo | ❌ | ✅ |
Next steps
Build in parallel
Kanban planning, background tasks, and changes applied back to the main version.
Design Canvas
Visual mockups and the hands-on visual editor.
Connectors
Connect BigQuery, Linear, Slack, Notion, and more.
Billing
Agent pricing, plan comparison, and spending management.
Vibe coding guide
Tips for effective prompting and building with AI.